Okay, so, I’ve been messing around with some woodworking lately, and I had this project where I wanted to stain some pine. I heard all sorts of things about how tricky it can be to get a good finish on pine, so I figured I’d give it a go and see for myself. Here’s how it went down.
First things first, I grabbed my piece of pine and started sanding. I started with some pretty rough sandpaper, something like 80 grit, to knock down the biggest imperfections. Then, I gradually moved up to finer grits – 120, 150, 220. The goal here is to get the surface super smooth, you know? After I sanded with 220 I sprayed some water and sanded it again with 220, I don’t know why but I just saw that on somewhere.
Now, here’s where the staining part comes in. I’d heard that pine can be a real pain to stain evenly because it’s so porous. Some parts just soak up the stain like a sponge, while others barely take any color. This can lead to a really blotchy, uneven look, which is not what I was going for.
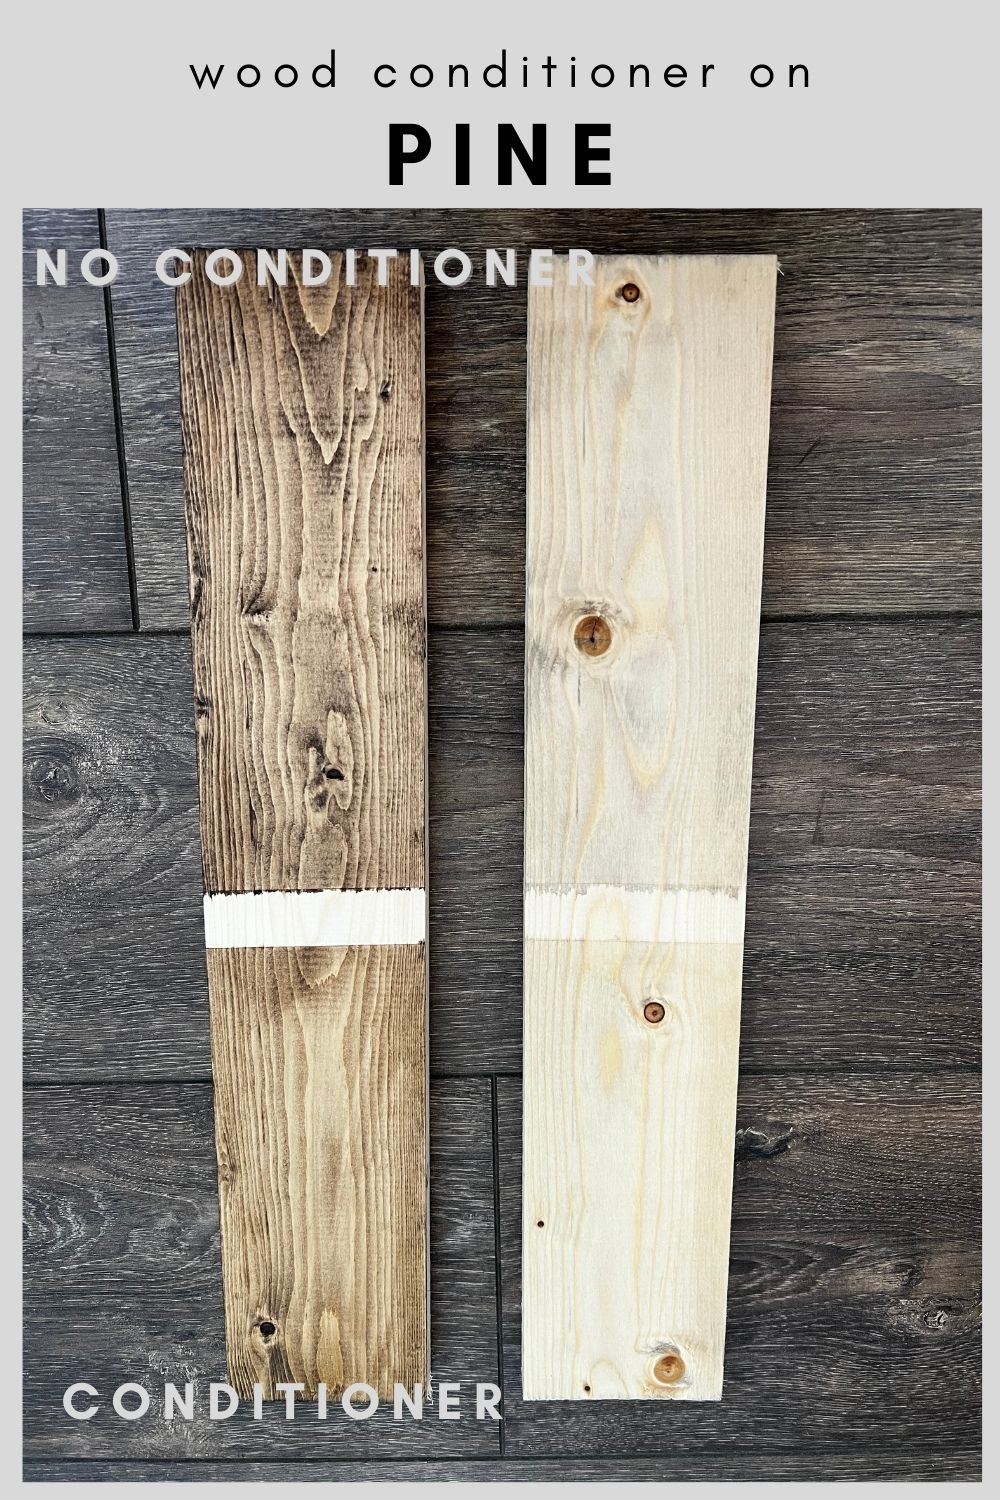
Someone told me that using a wood conditioner before staining could help. It’s basically this stuff you brush on that helps to even out the porosity of the wood. So, I gave that a shot. I applied a thin coat of conditioner, let it sit for a bit according to the instructions, and then wiped off the excess.
After the conditioner was dry, it was time for the stain. I chose a nice, medium-brown color that I thought would look good on the pine. I used a brush to apply the stain, making sure to work it into the wood and wipe off any extra.
The Waiting Game
Then came the waiting. I let the stain dry completely, which took a few hours. Honestly, this was the hardest part because I was so curious to see how it turned out! This step took me a few hours for sure.
The Result
Once the stain was dry, I could finally see the results. And you know what? It wasn’t half bad! The wood conditioner definitely seemed to help, because the color was a lot more even than I expected. There were still a few areas that were a bit darker than others, but overall, it looked pretty good.
To finish things off, I applied a couple of coats of polyurethane to protect the stain and give it a nice sheen. And that was it! My pine-staining adventure was complete.
My Takeaways
- Sanding is key: Taking the time to sand properly makes a huge difference in the final result.
- Wood conditioner is your friend: It really does help to even out the stain on porous woods like pine.
- Patience is a virtue: Waiting for the stain to dry completely is crucial.
So, there you have it. My experience with staining pine. It wasn’t perfect, but I learned a lot, and I’m pretty happy with how it turned out. If you’re thinking about staining pine, just remember to sand well, use a conditioner, and be patient. Good luck!


