Okay, so I decided it was finally time to upgrade my living room situation. I’d been rocking the same old, basic TV stand for years, and it just wasn’t cutting it anymore. I wanted something with more storage, more style – basically, a whole entertainment center upgrade. I’d been eyeing those “pier” style units, the ones with the shelves and cabinets on the sides of the TV, for a while. So, the journey began!
The Hunt
First things first, I needed to find the perfect pier entertainment center. I spent hours browsing online, checking out different styles, sizes, and colors. I even hit up a few local furniture stores, just to see things in person and get a feel for the quality. It was overwhelming, honestly! So many choices.
Making a Decision
After what felt like forever, I finally narrowed it down to a few options. I made a list of pros and cons for each one – considering things like price, storage space, material, and how well it would fit in my living room. I even measured my space multiple times, just to be extra sure. No one wants to deal with returns!
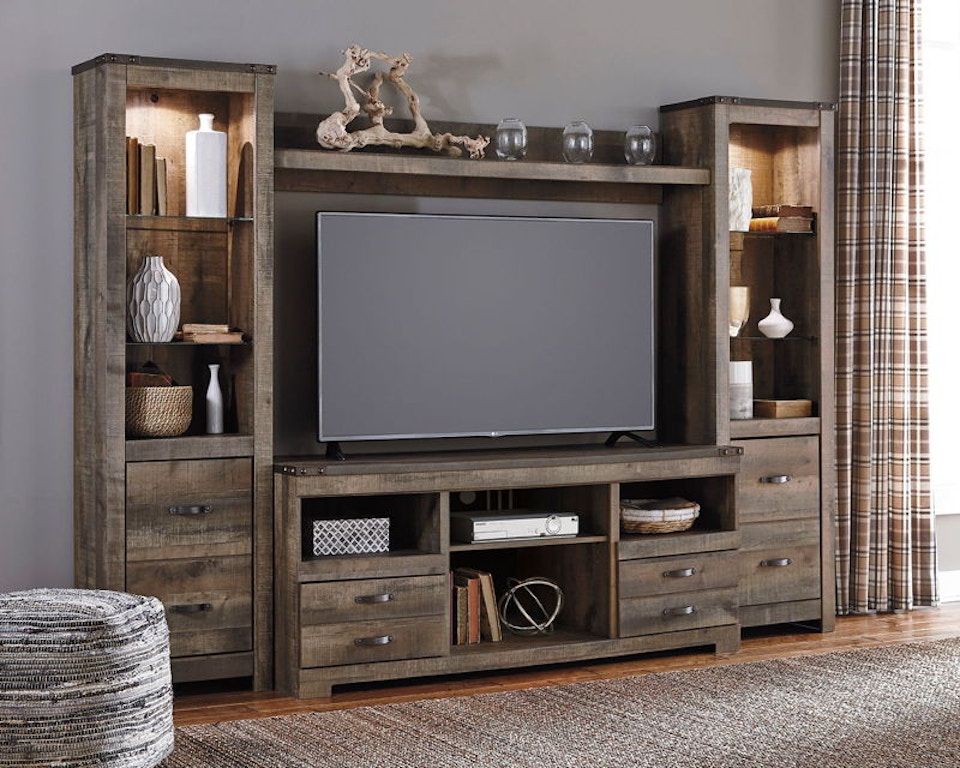
Ultimately, I went with this darker wood and a simple design. I want it classic,and I don’t want it to look too cluttered, so the simple one is better for my living room.
The Assembly
I chose the pier entertainment center,and then, the real fun began: assembly. Now, I’m not the handiest person in the world, but I’m pretty good at following instructions. The entertainment center arrived in like, three huge boxes. Seriously, it was intimidating.
I unpacked everything, laid it all out, and took a deep breath. I grabbed the instruction manual (which was surprisingly thick) and got to work. It was definitely a process. There were a lot of screws, bolts, and those little wooden dowel things.
- Step 1: I started with the base of the TV stand, connecting the main pieces.
- Step 2: Then, I moved on to the side piers, building the shelves and cabinets.
- Step 3: The trickiest part was probably attaching the top piece that connects the two piers. It took some maneuvering (and maybe a little bit of swearing).
It took me, no joke, most of the Saturday. I would guess 6-8 hours for my project,but I took breaks to eat and stretch. I felt so achy that day, but when I finished it. I’m so proud of myself.
The Final Result
But finally, it was done! I stepped back and admired my handiwork. It looked amazing! So much better than my old setup. I loaded up the shelves with books, movies, and some decorative stuff. I hooked up my TV and all the components. It was a total transformation.
Honestly, it was a bit of a challenge, but totally worth it. My living room looks so much more put-together now, and I have tons of extra storage. Plus, I can brag that I built it myself (mostly!). It’s a good feeling.


